When working with your design, you’ll often need to tweak the position and dimensions of each piece of lumber. The process is nearly identical on iPhone and iPad; Mac users will substitute a right-click for a long press.
Accessing Transformation Options
iPhone & iPad
Long-press any piece of lumber to open a contextual menu with:
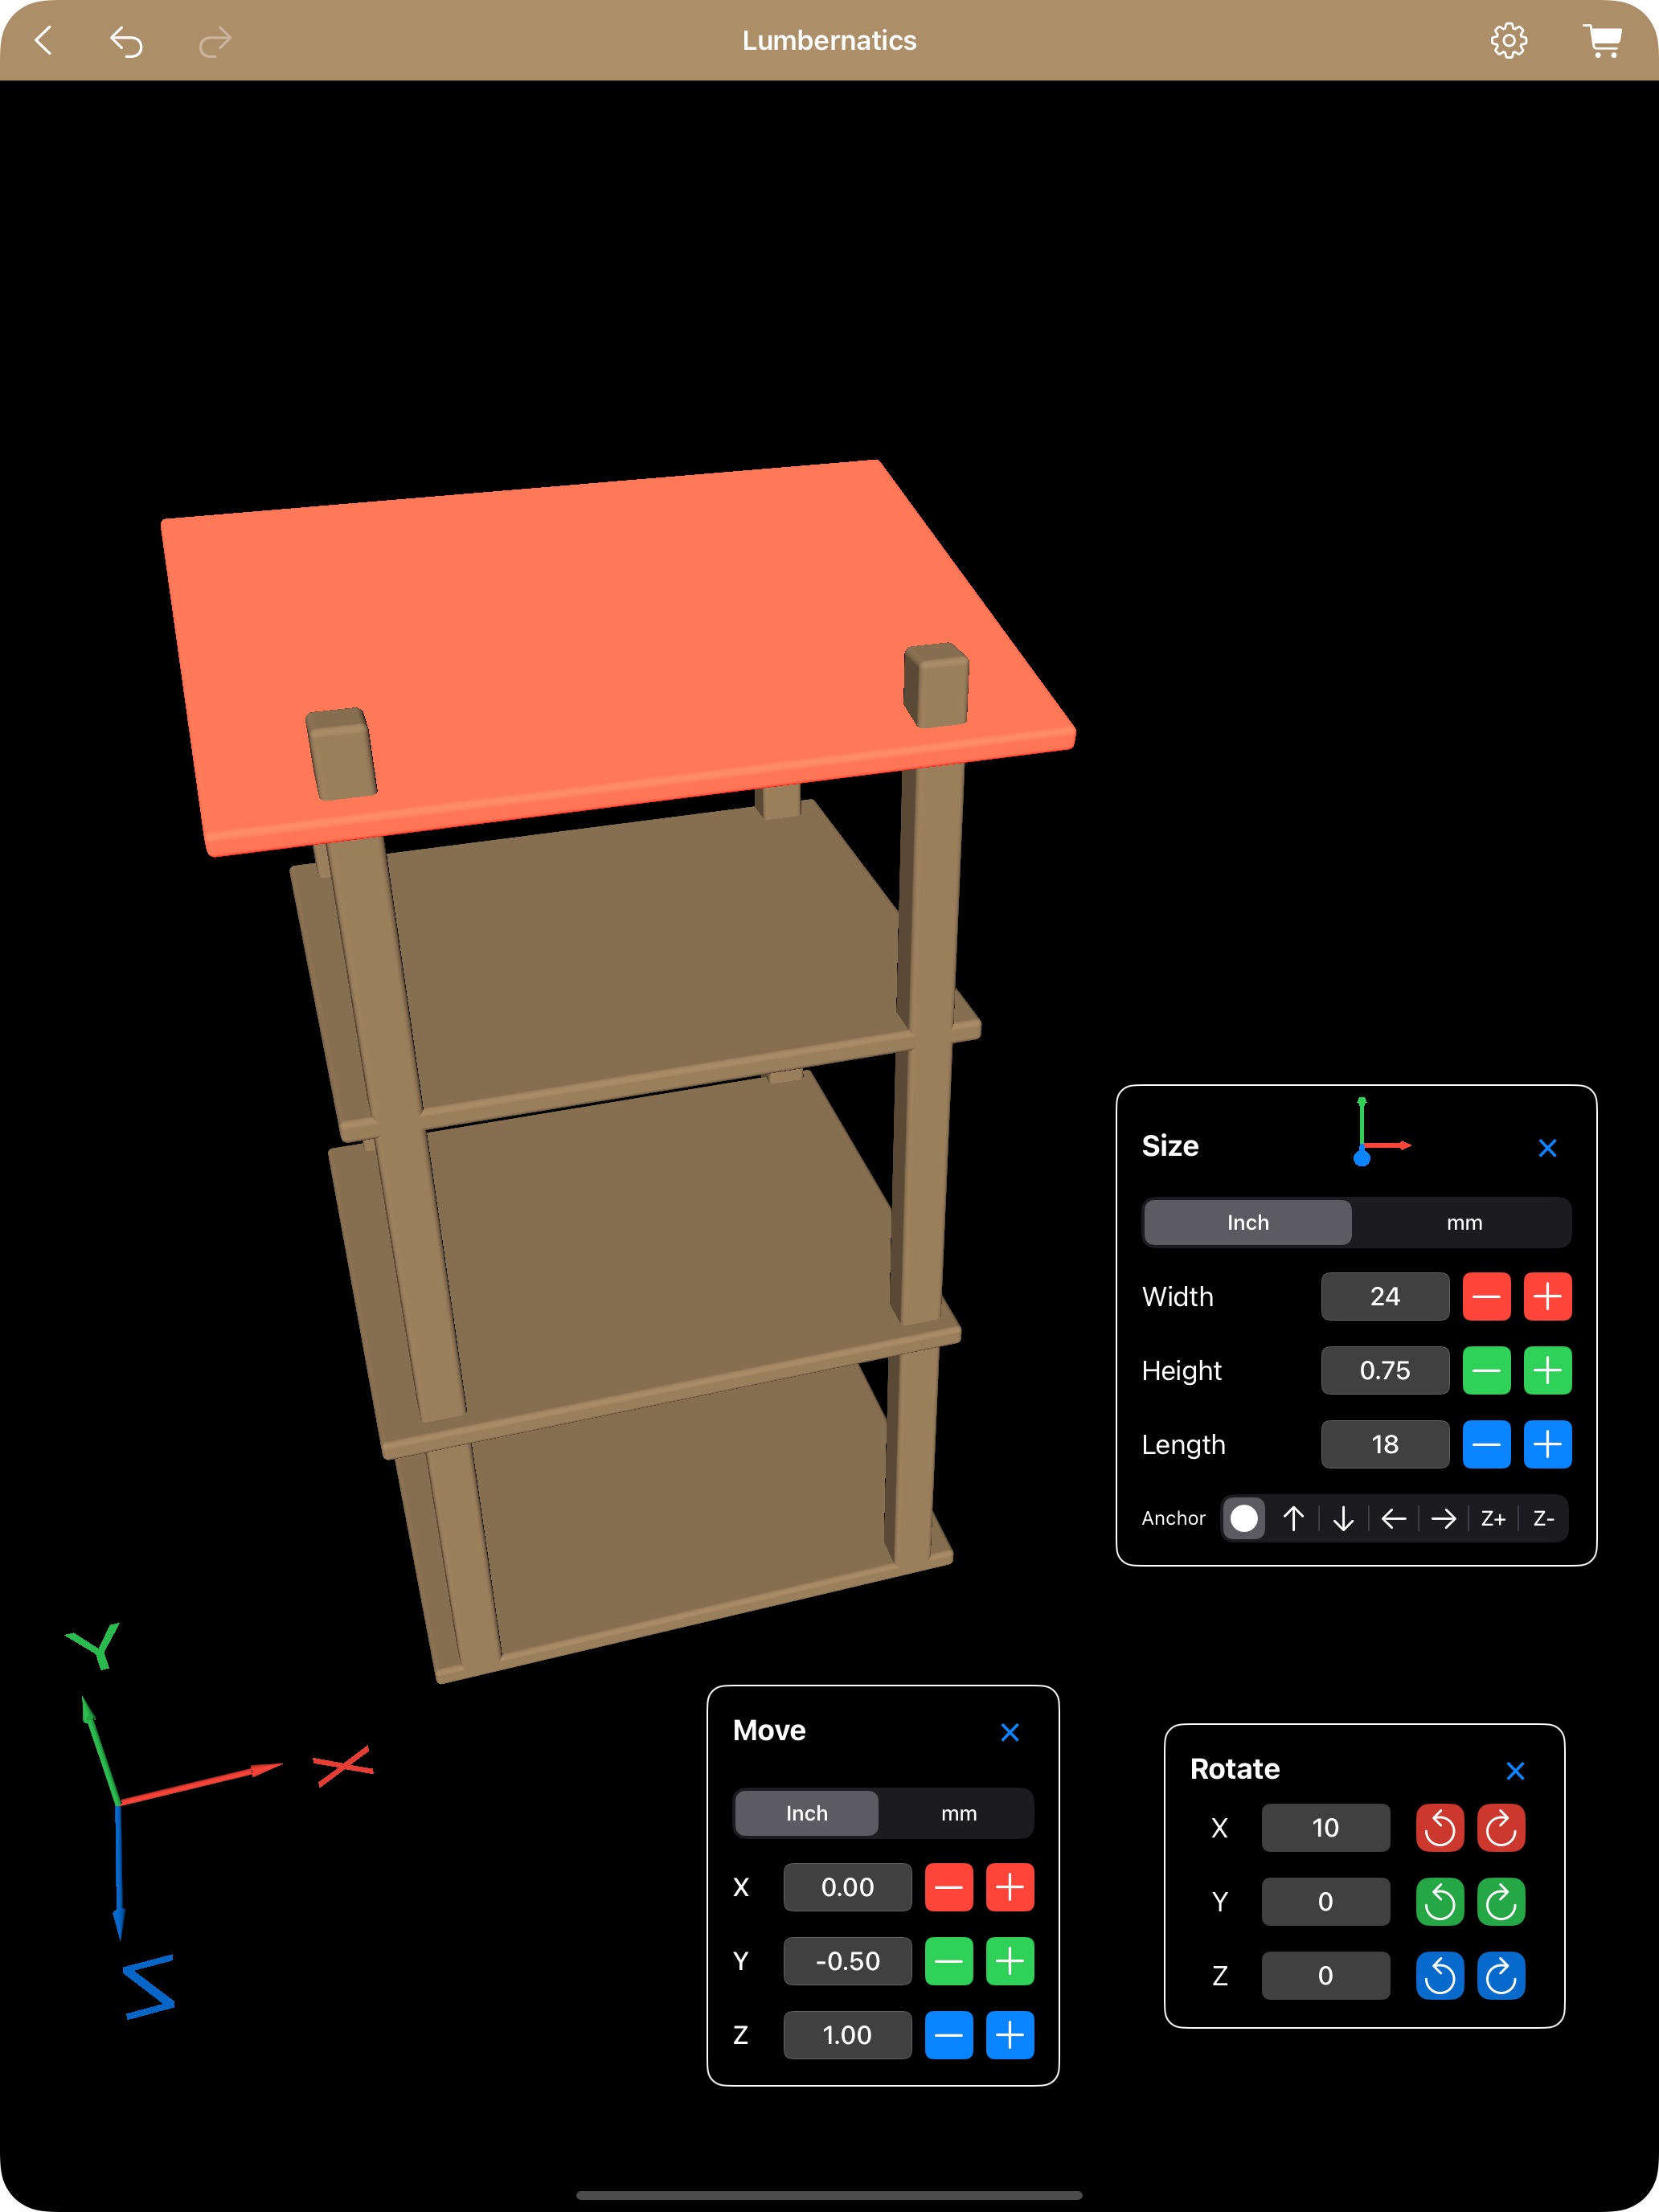
Resize
Rotate
Move
Mac
Right-click the piece of lumber to reveal the same options.
How to Move Lumber
Select “Move” from the contextual menu.
Drag or enter values along the x, y, and z axes to reposition.
Axis Markers (red = x, green = y, blue = z) can be toggled on/off:
Go to Settings
Toggle Show Axis Markers
How to Resize Lumber
Select “Resize” from the contextual menu.
By default, the anchor point is set to the center of the lumber:
Changing width will expand/contract equally in both directions.
Custom Anchor Points
Width Adjustment
Left Anchor: Left edge fixed; width grows to the right.
Right Anchor: Right edge fixed; width grows to the left.
Height Adjustment
Top Anchor: Top edge fixed; height grows downward.